> For the complete documentation index, see [llms.txt](https://help.felt.com/llms.txt). Markdown versions of documentation pages are available by appending `.md` to page URLs; this page is available as [Markdown](https://help.felt.com/data-sources/felt-servers.md).
# Felt Servers
Your workspace's spatial data in one place. Managed, permissioned, and ready to drop onto any map.
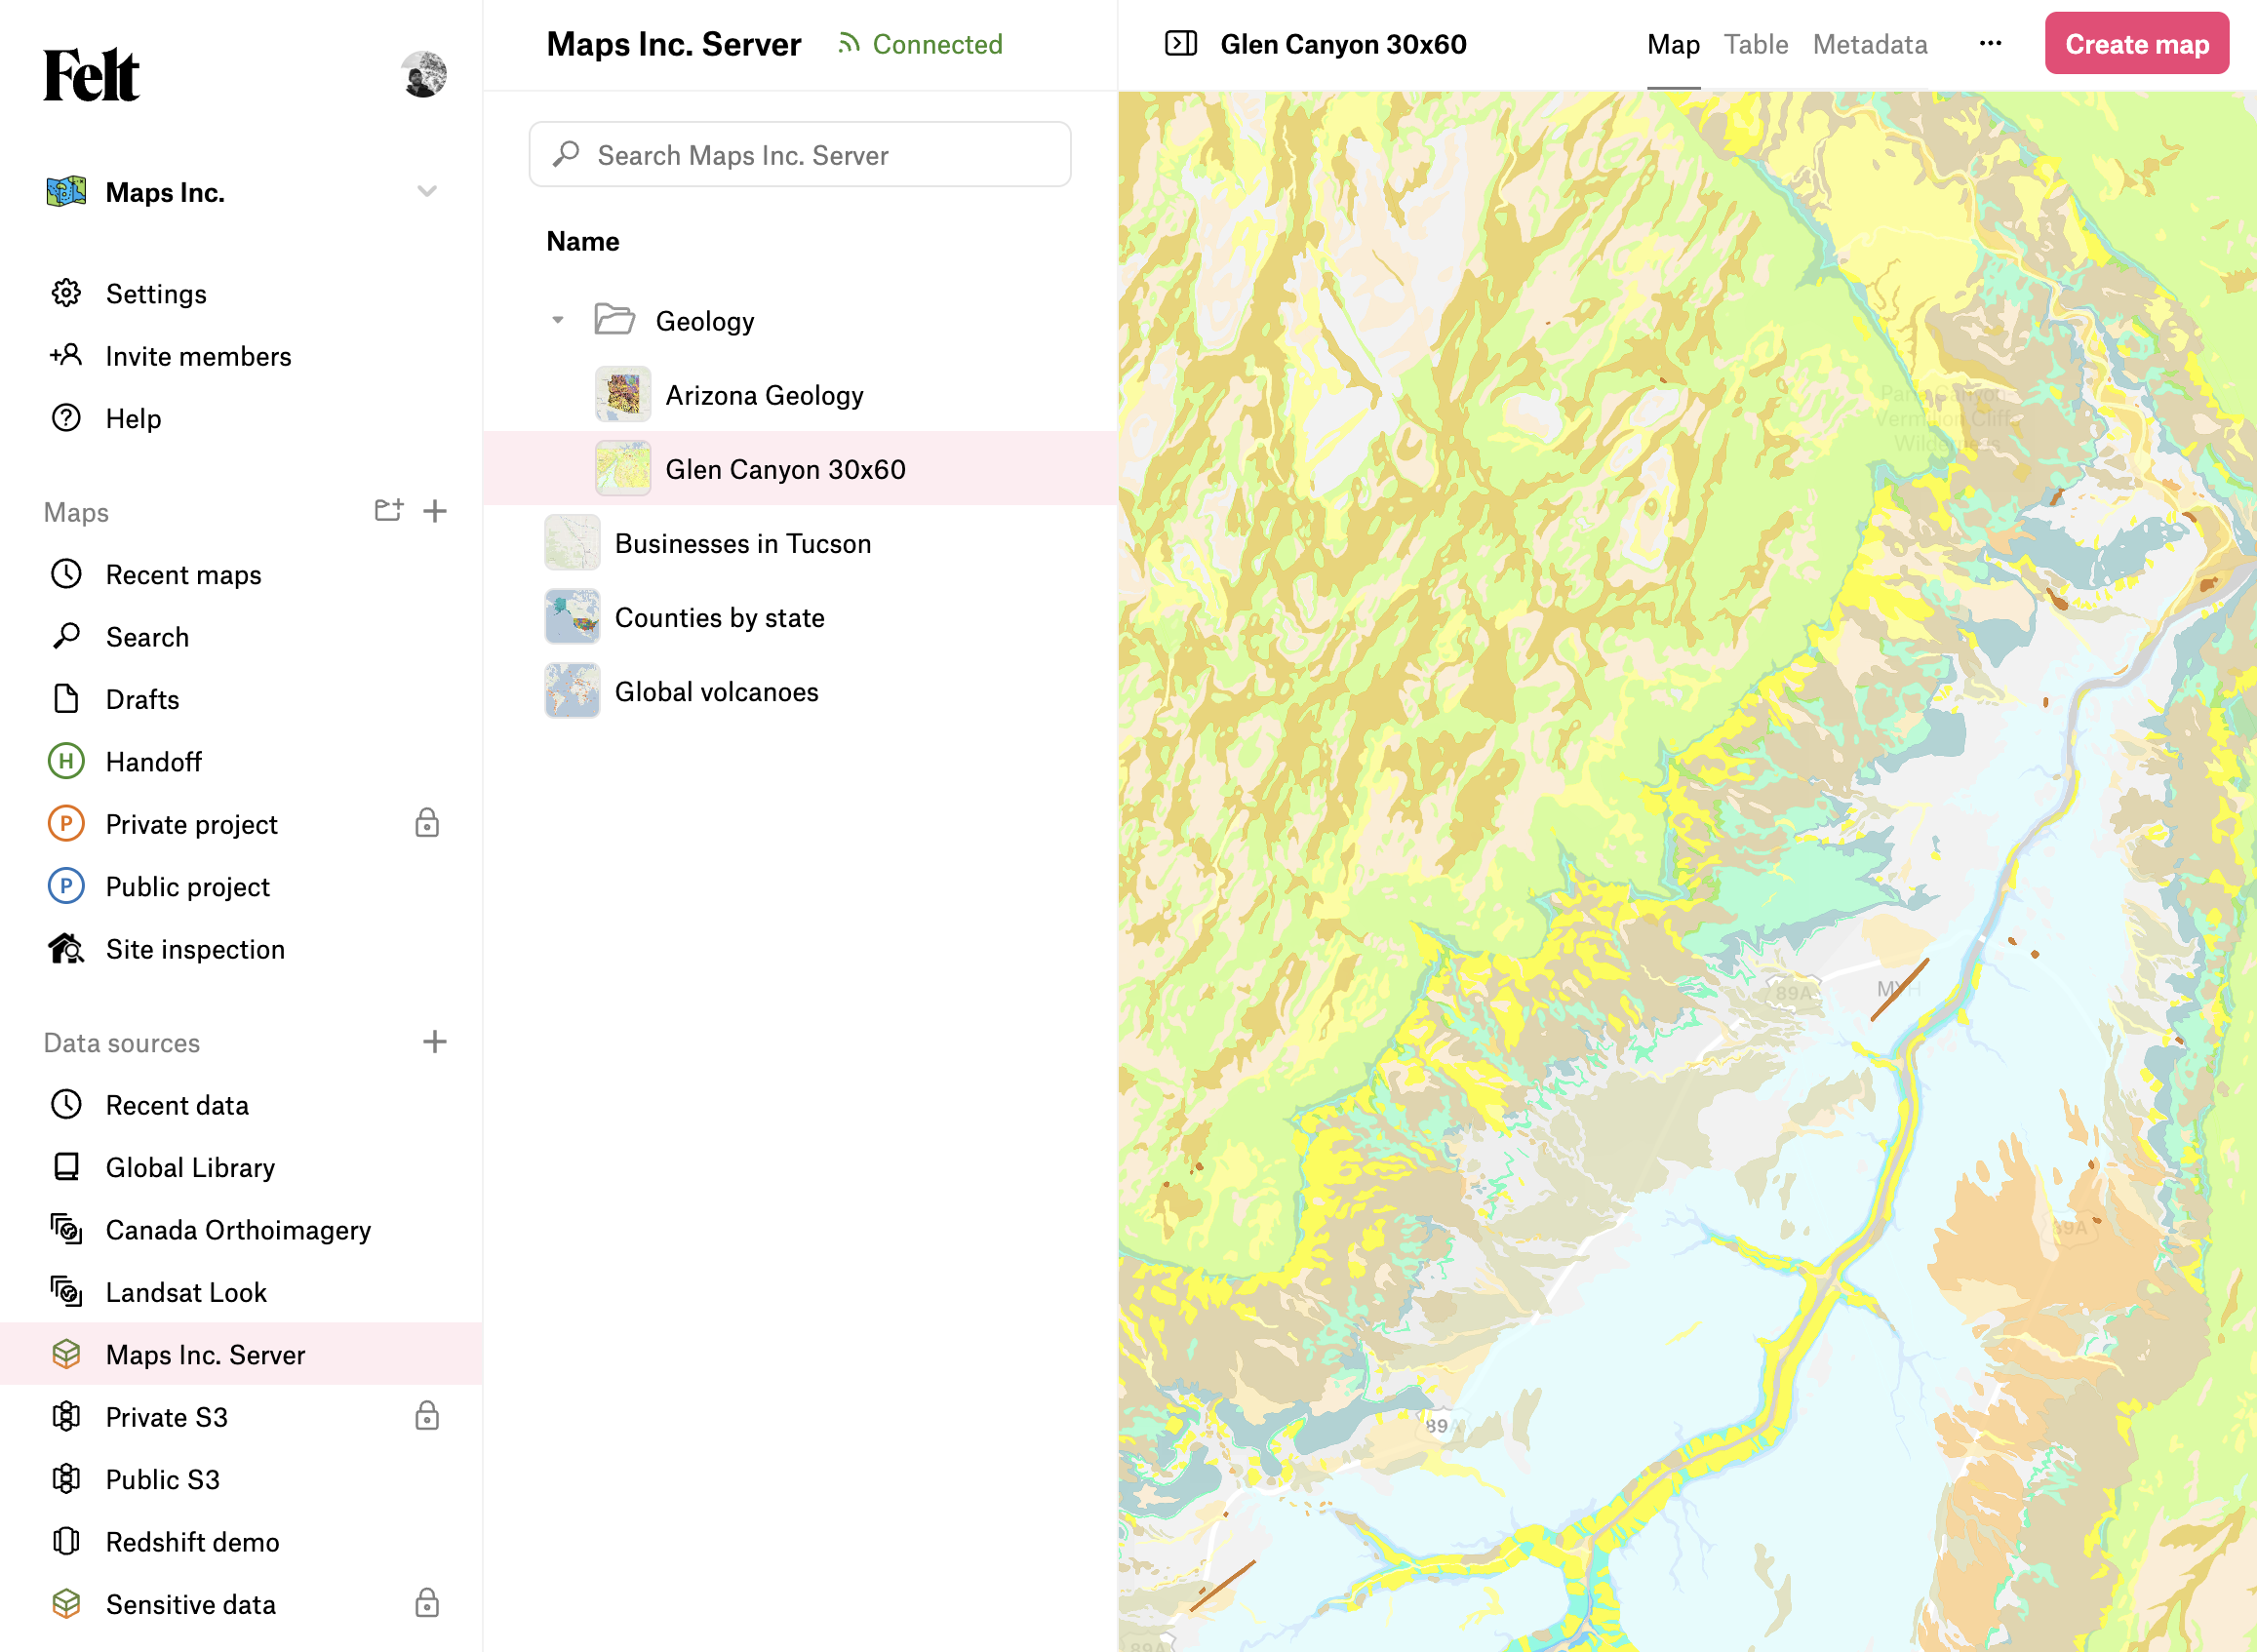
A **Felt Server** is a Felt-managed catalog of map layers your workspace can reuse. It sits alongside your external connections — Cloud sources like Postgres or Snowflake, with the same sharing options and permission model. While external sources connect to data that lives elsewhere, a Felt Server is where your published, styled, ready-to-reuse layers live inside of Felt.
{% hint style="success" %}
Felt Servers are available on all paid plans. **Professional** includes one Felt Server; **Enterprise** allows unlimited Felt Servers. See the [pricing page](https://felt.com/pricing) for details.
{% endhint %}
## Adding layers to a Felt Server
Layers can be added to a Felt Server in two ways: publish a layer from a map, or upload a file or URL straight into the server.
### Publishing from a map
From a map in edit mode:
1. Click the **···** menu on any layer in the legend and choose **Publish…** (or click the rocket icon in the layer's detail panel).
2. Under **Publish to**, pick a Felt Server and optionally a folder within it. You can always move the layer to a different folder or server later — see [Organizing a Felt Server](#organizing-a-felt-server).
3. Click **Publish**. The layer is added to the Felt Server you selected, and further edits you make to its data on the map sync with the version in the Felt Server.
{% hint style="info" %}
You can select several layers on a map to publish them all at once.
{% endhint %}
### Uploading directly
You can add data to a Felt Server without putting it on a map first:
* Click **Upload** in the server's header and choose **Upload file** to pick one or more files from your computer, or **From URL** to add data hosted at a URL.
* Or drag files from your computer onto the server. Drop them on a folder to put the new layer in that folder, or anywhere else in the list to add it at the server root.
Uploading to a Felt Server supports the same [file types](/upload-anything/files.md), [URL types](/upload-anything/urls.md), and authenticated URL imports as uploading to a map, and the same [limits](/upload-anything/limits.md) apply.
## Using a Felt Server layer
Any workspace member with access to the server can add its layers to their maps:
1. Open a map and click  in the toolbar.
2. Pick the Felt Server from the sidebar.
3. Find the layer and click **Add to map**.
Members with Edit access to the server can edit the layer's data from any map, and the changes sync back to the server and to every other map using it. See [Real-time sync](#real-time-sync) below.
## Real-time sync
When you publish a layer to a Felt Server or add a Felt Server layer to a map, the layer on your map is by default synced to the shared source. Editing the data of any synced layer is immediately reflected on all other other synced instances of the layer.
### What syncs and what doesn't
Shared across every map using the layer:
* Feature data and attributes: adding, editing, moving, and deleting features, and changing attribute values.
* Attribute edits: adding, modifying, or deleting columns.
Set per map:
* Layer name, styling, filters, legend settings, and dashboard components. A synced layer arrives with the published defaults, but you can change any of those defaults on your map without affecting the source or other maps.
### Where you see sync in the app
* Legend: synced layers show a green sync badge. Hover it for the sync tooltip, or click it to open the layer's Data tab.
* Data tab: in the layer's [detail panel](/getting-started/tour-the-interface.md#detail-panel), the Data tab shows Status as **Real-time sync**, a **Sync** toggle, and Source and Dataset rows. Click **Source** to open the Felt Server, or **Dataset** to jump to the published layer in it.
* Synced layer banner: when you edit a feature or open the layer's table, a banner reading **Edits synced in real-time** appears above the feature form and in the table header. Click **More info** to see how many maps the layer is used on and to turn off sync.
### Turning off sync
Anyone with Edit access to the map can turn off sync for a layer on that map. Either:
* Open the layer's Data tab and switch off the **Sync** toggle, or
* Click **More info** in the synced layer banner and choose **Turn off sync for this map**.
Felt asks you to confirm: the layer will stop syncing with its source and become independent. It keeps its current data and edit history, and other maps aren't affected. Once you confirm, the layer becomes an ordinary map-only layer. The Data tab keeps the Source and Dataset rows so you can still find where the data came from.
Sync is also turned off automatically, on every map using the affected layers, when someone deletes the published layer, deletes its folder, or deletes the Felt Server. The layers stay on their maps with their data.
### Permissions
Edits that sync back to the Felt Server require Edit access on the server. If you have View access, you can add the layer to your maps and see live updates, but you can't make synced edits. See [Sharing a data source](/sharing-and-collaboration/sharing-a-data-source.md) for what each role on a Felt Server can do.
### Duplicating
* Duplicating a synced layer, or a map that contains one, within the same workspace creates another synced layer of the same source.
* Adding a Felt Server layer to a map from the **Data sources** dialog also creates a synced layer.
* Duplicating into a different workspace creates an independent copy. Sync never crosses workspaces.
See [Duplicating a map](/sharing-and-collaboration/duplicating-a-map.md).
### Offline use
Synced layers can be downloaded for offline use in the Field App like any other layer. Edits you make offline sync to the source when you're back online. You need to be online to turn sync off. See [Offline support](/field-app/offline-support.md).
## Organizing a Felt Server
Layers and folders in a Felt Server can be renamed, moved, exported, and deleted directly from the server, without going back to a map. Open the ··· menu on any row, or right-click it, to see the available actions. You need Edit access to the server to make changes.
### Layers
* **Rename a layer.** Choose Rename, type the new name, then press Enter or click away to confirm, or press Escape to cancel. Renaming a published layer doesn't rename it on maps that already use it.
* **Move a layer.** Choose Move, then pick a destination. Layers can be moved into any folder, back to the server root, or to a different Felt Server. You can also drag a layer onto a folder. Moving a layer doesn't interrupt sync on maps that use it.
* **Export a layer.** Choose Export, then pick a format. This downloads the layer's current data without adding it to a map. If a published layer group holds several layers, Export opens a submenu with one entry per layer. See [Exporting data](/sharing-and-collaboration/exporting/exporting-data.md) for formats and limits.
* **Delete a layer.** Choose Delete published layer. Deleting a published layer turns off sync on any maps using it; the layer stays on those maps and keeps its data.
* **Select multiple layers.** Click a row to select it, then Cmd/Ctrl-click to add or remove individual rows, or Shift-click to select a range. The right-click menu then acts on the whole selection, so you can move several layers at once. Rename, export, and delete act on one layer at a time. Folders can't be part of a multi-selection.
### Folders
Use folders (and subfolders) to group related layers.
* **Create a folder.** Click New folder in the server's header. If you have layers selected when you click it, they're moved into the new folder right away. You can also create subfolders directly by right-clicking a folder and selecting New subfolder.
* **Rename a folder.** Choose Rename, then confirm with Enter or cancel with Escape.
* **Move a folder.** Choose Move, then pick another folder or the server root. Folders move with everything inside them and stay within their own Felt Server.
* **Delete a folder.** Choose Delete folder. This also deletes every subfolder and layer inside it. Sync is turned off for any map layers connected to them, but those layers stay on their maps and keep their data.
### Drag and drop
You can also organize by dragging rows around the list:
* Drag one or more selected layers, or a folder, onto a folder to move them inside it. Hovering over a closed folder opens it so you can drop into a subfolder.
* Drag onto the empty space below the list to move the dragged items back to the server root.
Dragging files from your computer onto the list uploads them instead. See [Uploading directly](#uploading-directly).
### Multiple servers
A default Felt Server is created automatically with every new paid workspace. Enterprise workspaces can have more than one Felt Server — for example, one for operations, one for infrastructure, one for public-facing assets — each with its own content and sharing settings. To create a new server:
1. From the workspace homepage, click **+** next to **Data sources**.
2. In the **New data source** dialog, choose **Felt Server**.
3. Give it a name and an optional description, then click **Create**.
## Sharing a Felt Server
Click **Share** in the server's header to open the Share dialog. Invite members by email, pick a role (Source admin, Edit, or View), or set a workspace-wide default for all members. Read more about sharing at [Sharing a data source](/sharing-and-collaboration/sharing-a-data-source.md).
## Server settings
Click **Settings** in the server's header to rename the server, edit its description, or delete it.
Deleting a server permanently deletes every folder and layer inside it. Sync is turned off for any map layers connected to the server; those layers stay on their maps and keep their data.
---
# Agent Instructions
This documentation is published with GitBook. GitBook is the documentation platform designed so that both humans and AI agents can read, navigate, and reason over technical content effectively. Learn more at gitbook.com.
## Querying This Documentation
If you need additional information that is not directly available in this page, you can query the documentation dynamically by asking a question.
Perform an HTTP GET request on the current page URL with the `ask` query parameter, and the optional `goal` query parameter:
```
GET https://help.felt.com/data-sources/felt-servers.md?ask=&goal=
```
`ask` is the immediate question: it should be specific, self-contained, and written in natural language.
`goal` is optional and describes the broader end goal you are ultimately trying to accomplish on behalf of the user. GitBook uses it to tailor the answer towards what is most useful for that goal.
The response will contain a direct answer to the question and relevant excerpts and sources from the documentation.
Use this mechanism when the answer is not explicitly present in the current page, you need clarification or additional context, or you want to retrieve related documentation sections.